
What is Mastatest®?
Mastatest® lapbox and cartridges are intended to identify bacteria causing clinical mastitis in dairy cows, and to determine antibiotic sensitivities.
Included with Lapbox
Ethernet (LAN) cable, power adaptor cable, Allen (hex) key for removing lid covers for SD card and cleaning access, antenna and these instructions. Recommend Allen key is taped to the lapbox and these instructions adhered to nearby wall.
High Somatic Cell Count (HiSCC) testing guide
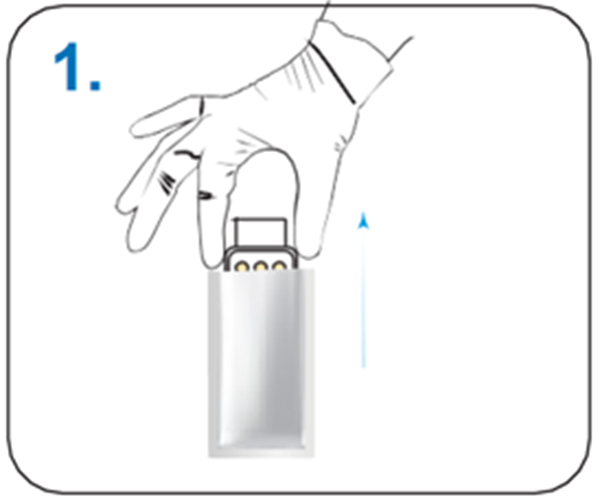 |
Put on clean gloves and remove a twin (HiSCC) cartridge from packaging
|
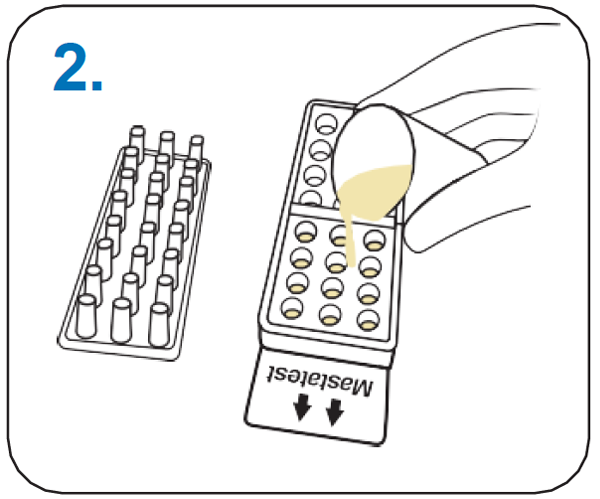 |
Remove cartridge lid and place upside down. Half-fill chamber 1 with milk sample 1.
|
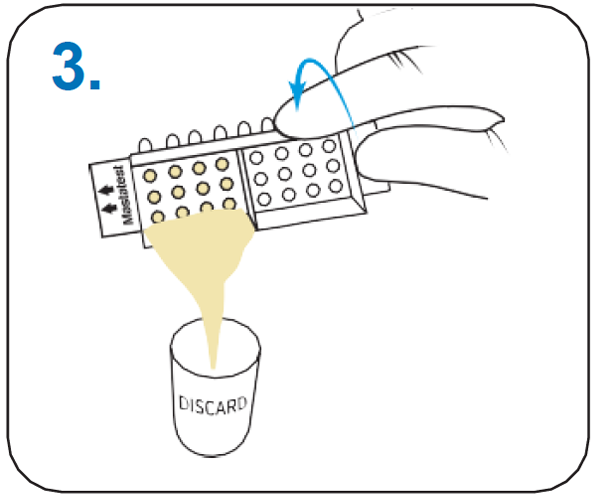 |
Pour off surplus milk from chamber 1 and discard
|
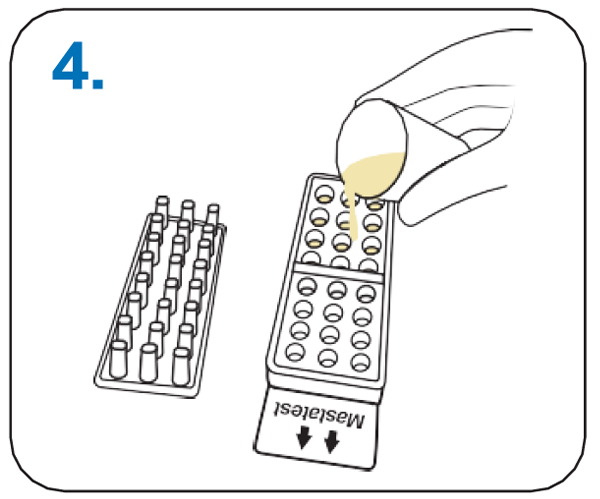 |
Half-fill chamber 2 with milk sample 2
|
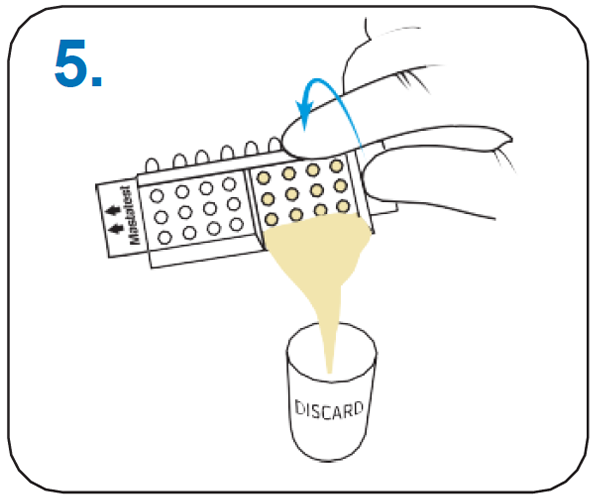 |
Pour off surplus milk from chamber 2 and discard
|
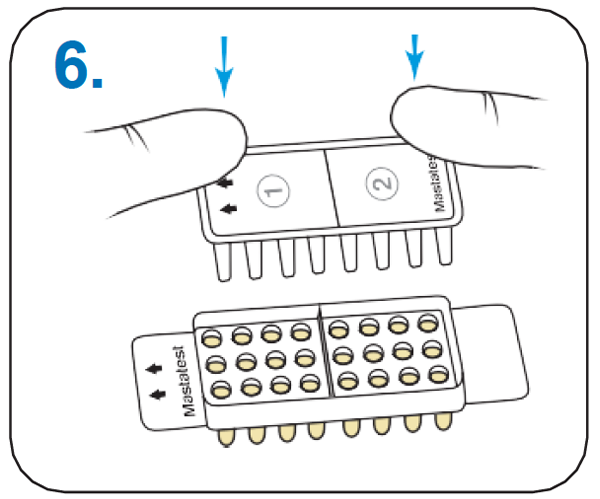 |
Replace lid, ensuring the arrows align with those on the base. Press down firmly to close.
|
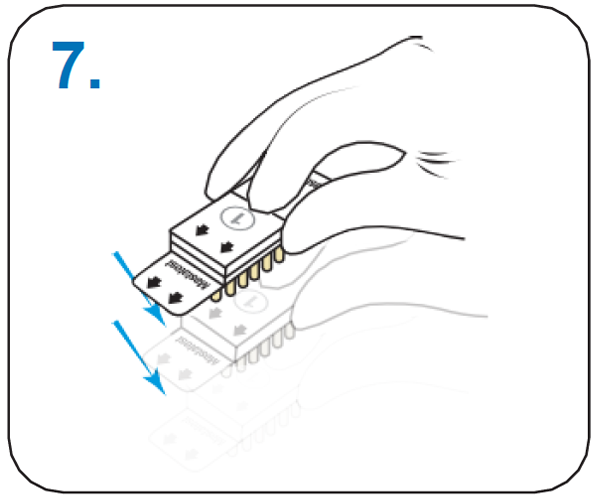 |
Tap firmly 2-3 times, repeating if air-bubbles are visible in the wells
|
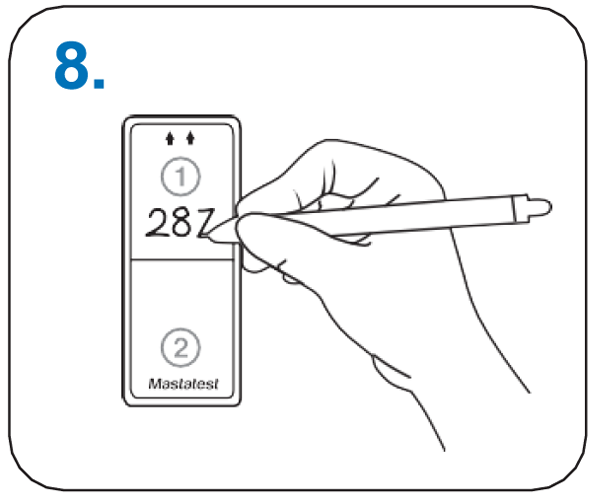 |
Label cartridge lid with correct cow numbers for samples 1 and 2
|
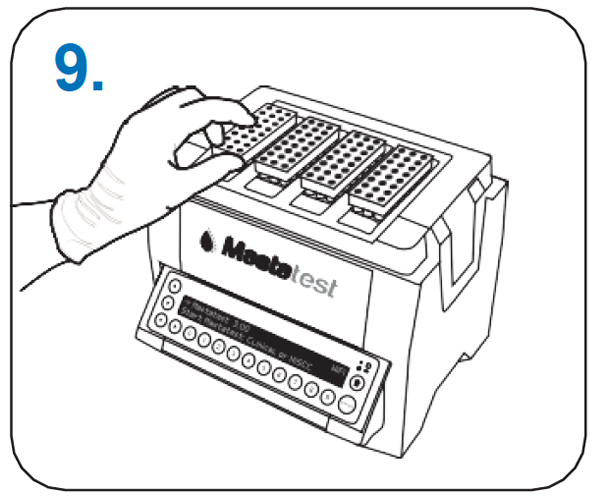 |
Insert cartridge into Lapbox with the arrows facing to the back, and replace the lid
|
 |
|
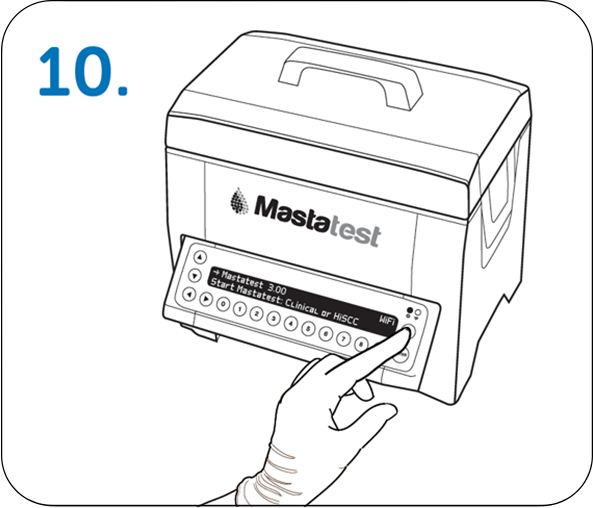
Start a Mastatest®
To Begin:

• Select Lapbox position used: If first free position used or scroll  to select and
Option 1: BoxStart
 to select HiSCC
 • Select BoxStart
• Input cow number (e.g. 00123) and scroll
to select quarter for sample 1. Repeat for sample 2.
Option 2: QuickStart
to select QuickSCC Set-up the Mastatest® Lapbox™ in 3 easy steps:
1. INSTALL LAPBOX
• Fold out screen by pulling from underneath (To fold away, push silver buttons either side of Lapbox)
• The default language is English. To change, from the main menu scroll:
- to Configure Lapbox , to Select language then scroll to select
- Return to the main menu: 

2. REGISTER
• Login, or create an account at vetoquinol.mastatestsystem.com portal.
- Lapbox ID (from the Lapbox main menu,
to select Lapbox Information )- Serial number (on rear of Lapbox)
- On Lapbox, select to return to main menu
3. CHECK CONNECTION
• Check red  and green
  lightsare showing on the display.
• Scroll down to select Test upload to Cloud then . If successful, Lapbox is ready to use.
• to return to main menu.
CARE
CONNECT VIA WiFi (NB: ethernet is recommended - see above for connecting via ethernet)
Starting from the Lapbox main menu:
1. Configure for WiFi
- Scroll down to Configure Lapbox
to Set WiFi and wait for Lapbox to restart
to Configure Lapbox, then to Setup WiFi Connection, then to scan for networks, then scroll to your chosen network, and to select to Setup WiFi Connection
NB: > –65dBm, and 2.4 GHz WiFi required
to Set WiFi password, then and to select characters. Long-press when complete again to save to return to main menu
to Test upload to Cloud, then -
to return to main menu")
")
")